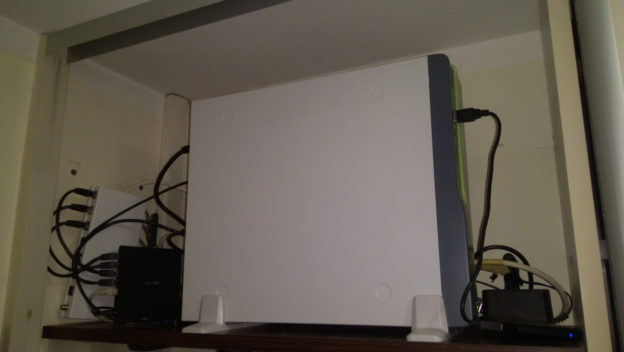
For many months I was thinking about buying a NAS (Network Attached Storage) for home use. My goal was not just a typical NAS, but something more. Something that I could use in my work. Not only for file storage, but also a toy for docker, nginx, media center, etc.
At first I have thought about simplest solution – buying QNAP device. Below you can find comparison of the models which I have considered.
| TS-228A | TS-231P | TS-231P2 | TS-251 | |
| OS | Linux | Linux | Linux | Linux |
| CPU | Quad-core Realtek RTD1295 | Annapurna Labs Alpine AL-212 2-core | Annapurna Labs Alpine AL-314 4-core | Dual-core Intel® Celeron® |
| CPU Freq | 1.4GHz | 1.7 GHz | 1.7 GHz | 2.41GHz (Up to 2.58GHz) |
| Memory (RAM) | 1GB | 1GB | 1GB / 4 GB | 4GB |
| Number of RAM Slots | 0 | 0 | 1 (Max 8GB) | 2 (Max 8 GB) |
| Max. number of HDDs/SSDs | 2 x 2.5″/3.5″ | 2 x 2.5″/3.5″ | 2 x 2.5″/3.5″ | 2 x 2.5″/3.5″ |
| Power Consumption (W) | 5-12 | 9-16 | 9-24 | 10-20 |
| Price | 173 EUR | 200 EUR | 240 EUR | 300 EUR |
Unfortunately, integrated sets have many disadvantages. For example:
- no or limited expandability (more RAM or better CPU – forget!),
- limited number of applications,
- relatively expensive,
- threatened by fast EoL (try upgrade software in 2 years)
I was also thinking about CloudShell2 with Ordoid XU4 but the price of the kit is 175 EUR. See more here.
Because of these limitations, I finally decided to challenge myself and build my own low-cost NAS server.
Chassis
The most difficult part was finding the right chassis. It should be small and at the same time large enough to accommodate many hard drives: for system 1 x 2.5″ and for storage 3 x 3.5″ – 2 disks working as RAID1 for user data + 1 disk for media.
I have found old version of model In-Win BL631 – without USB3.0 ports on front.
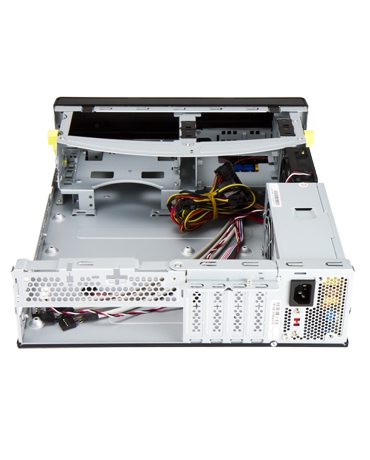
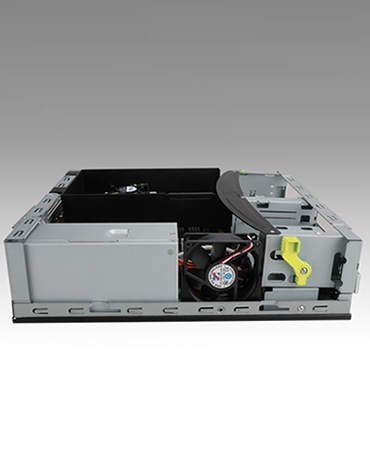
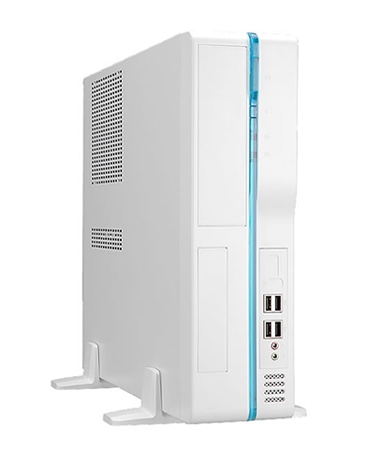
- External Drive Bays: 1 x 5.25″ & 1 x 3.5″
- Internal Drive Bays: 2 x 3.5″ & 1 x 2.5″
- I/O Expansion Slots: 4 x Low Profile Slot
- Built-in PSU 300W
I don’t know how but somehow I managed to buy this chassis for 8 EUR! Seriously :-).
Attention: The side fan (80x80x25mm) attached to the set is quite loud. I bought fan of a better quality and replaced the default one.
Motherboard
The choice was simple. I used the micro-ATX Gigabyte GA-G41MT-S2 witch CPU Intel Core 2 Duo E4600 from old computer. The disadvantages of this mobo are unfortunately: max 8GB RAM, no USB 3.0 and only SATA 3Gb/s connectors. If you want use SATA 6Gbps you may buy and install PCI Express SATA Controller.
As the advantages I can mention: 1Gbps LAN port and the old but still good LGA775 socket support.

Two core CPU Intel E4600 (TDP 65W) is listed in the second half of the PassMark rate for LGA775 processors. I’m going to upgrade CPU to Intel Core 2 Quad (TDP 95W).
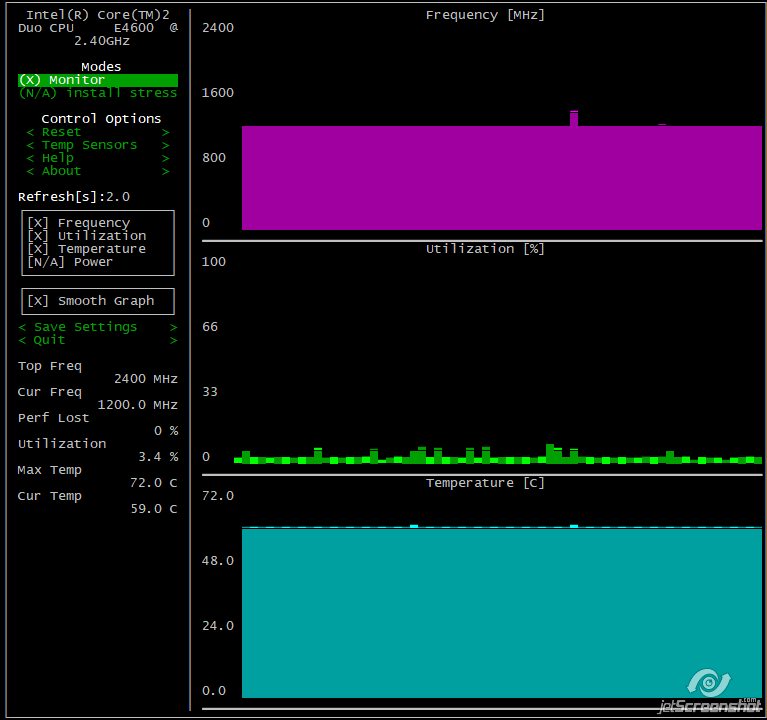
Attention: Standard CPU cooler could be not enough because of compact chassis. My server is located in a cabinet, the air flow is limited. Now in idle state CPU core temperature is 57-60 °C, I think that is too much so I consider buying better quality cooler and mounting additional fan in the cabinet.
This mobo doesn’t have USB 3.0 ports so I needed to extend it via external PCI Express Card. Ports will be used to backup data.
Operating system
Of course the only right one: Linux. I decided to install OpenMediaVault based on Debian distribution. The second system worth considering is FreeNAS. See comparison and choose yourself the best for you.
Summary
I spent about 60 EUR on building my server – as I said, a processor with mobo and RAM memory recovered from the garbage. The remaining items I bought on well-known auction portals. This is quarter the price of middle-range brand-new QNAP. Detailed expenses are listed in the table below.
| Name | Price | |
| Chassis | SFF Slim Chassis In-Win BL631 (new) | 8 EUR |
| Motherboard | Gigabyte GA-G41MT-S2 rev 1.3 (used) | 23 EUR |
| Side fan | Arctic Cooling F8 (80x80x25mm) | 5 EUR |
| Processor | Intel Core 2 Duo E4600 2×2,4GHz (used) | 3 EUR |
| RAM | 2 x 2GB DDR3 PC3-1333MHz (used) | 14 EUR |
| PCI card | PCI Express UBB3.0 (used) | 4 EUR |
| System disk | SSD 128GB ADATA SU800 (new) | 35 EUR |
| Other | SATA cables, etc. | 8 EUR |
| Total: | 100 EUR |
As mass storage we can use any hard disk designed for work 24 hours, 7 days a week – for example Seagate IronWolf or WD Red series. In my case the main storage is created on one WD Red 3TB disk – ca. 105 EUR.
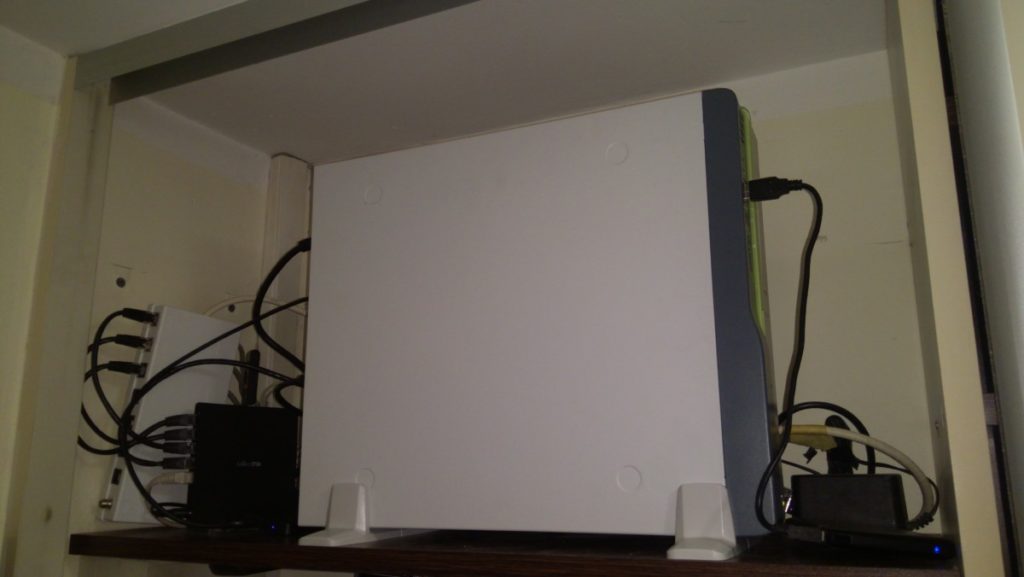

My NAS has one big disadvantage – power consumption. In the idle state wattmeter shows a value ca. 50W. A lot compared to QNAP devices.
Disk tests
Disk performance was checked using bonnie++ package.
bonnie++ -d ./ -r 2048 -u root\dev\sda result (SSD disk)
| Version 1.97 | Sequential Output | Sequential Input | Random Seeks | Sequential Create | Random Create | |||||||||||||||||||||
| Size | Per Char | Block | Rewrite | Per Char | Block | Num Files | Create | Read | Delete | Create | Read | Delete | ||||||||||||||
| K/sec | % CPU | K/sec | % CPU | K/sec | % CPU | K/sec | % CPU | K/sec | % CPU | /sec | % CPU | /sec | % CPU | /sec | % CPU | /sec | % CPU | /sec | % CPU | /sec | % CPU | /sec | % CPU | |||
| SSD | 4G | 312 | 99 | 205734 | 47 | 108435 | 26 | 966 | 99 | 218986 | 23 | 8412 | 156 | 16 | 32056 | 81 | +++++ | +++ | +++++ | +++ | +++++ | +++ | +++++ | +++ | +++++ | +++ |
| Latency | 31708us | 36419us | 107ms | 20977us | 20457us | 18070us | Latency | 2521us | 642us | 1909us | 269us | 477us | 1631us | |||||||||||||
\dev\sdb result (HDD disk)
| Version 1.97 | Sequential Output | Sequential Input | Random Seeks | Sequential Create | Random Create | |||||||||||||||||||||
| Size | Per Char | Block | Rewrite | Per Char | Block | Num Files | Create | Read | Delete | Create | Read | Delete | ||||||||||||||
| K/sec | % CPU | K/sec | % CPU | K/sec | % CPU | K/sec | % CPU | K/sec | % CPU | /sec | % CPU | /sec | % CPU | /sec | % CPU | /sec | % CPU | /sec | % CPU | /sec | % CPU | /sec | % CPU | |||
| WD Red | 4G | 331 | 98 | 150965 | 37 | 76428 | 19 | 1067 | 97 | 170276 | 21 | 417.8 | 10 | 16 | 26389 | 78 | +++++ | +++ | 30362 | 78 | 28291 | 80 | +++++ | +++ | 30115 | 77 |
| Latency | 46904us | 101ms | 100ms | 31127us | 79169us | 476ms | Latency | 1935us | 1205us | 885us | 1929us | 515us | 568us | |||||||||||||
TODOs in the nearest future
- buy two WD Red 1T disk and create RAID 1 storage for sensitive data,
- buy PCIe SATA 6.0 Gb/s controller for storage (now is only 3.0Gb/s)
- upgrade CPU to Intel Core 2 Quad
- change standard mobo CPU cooler to more effective
